TV Login
You can configure a Login and Sign-Up flow in your app to block access to the application, or specific sections/content, for non-subscribers. The authorization flow acts as illustrated in the following diagram:
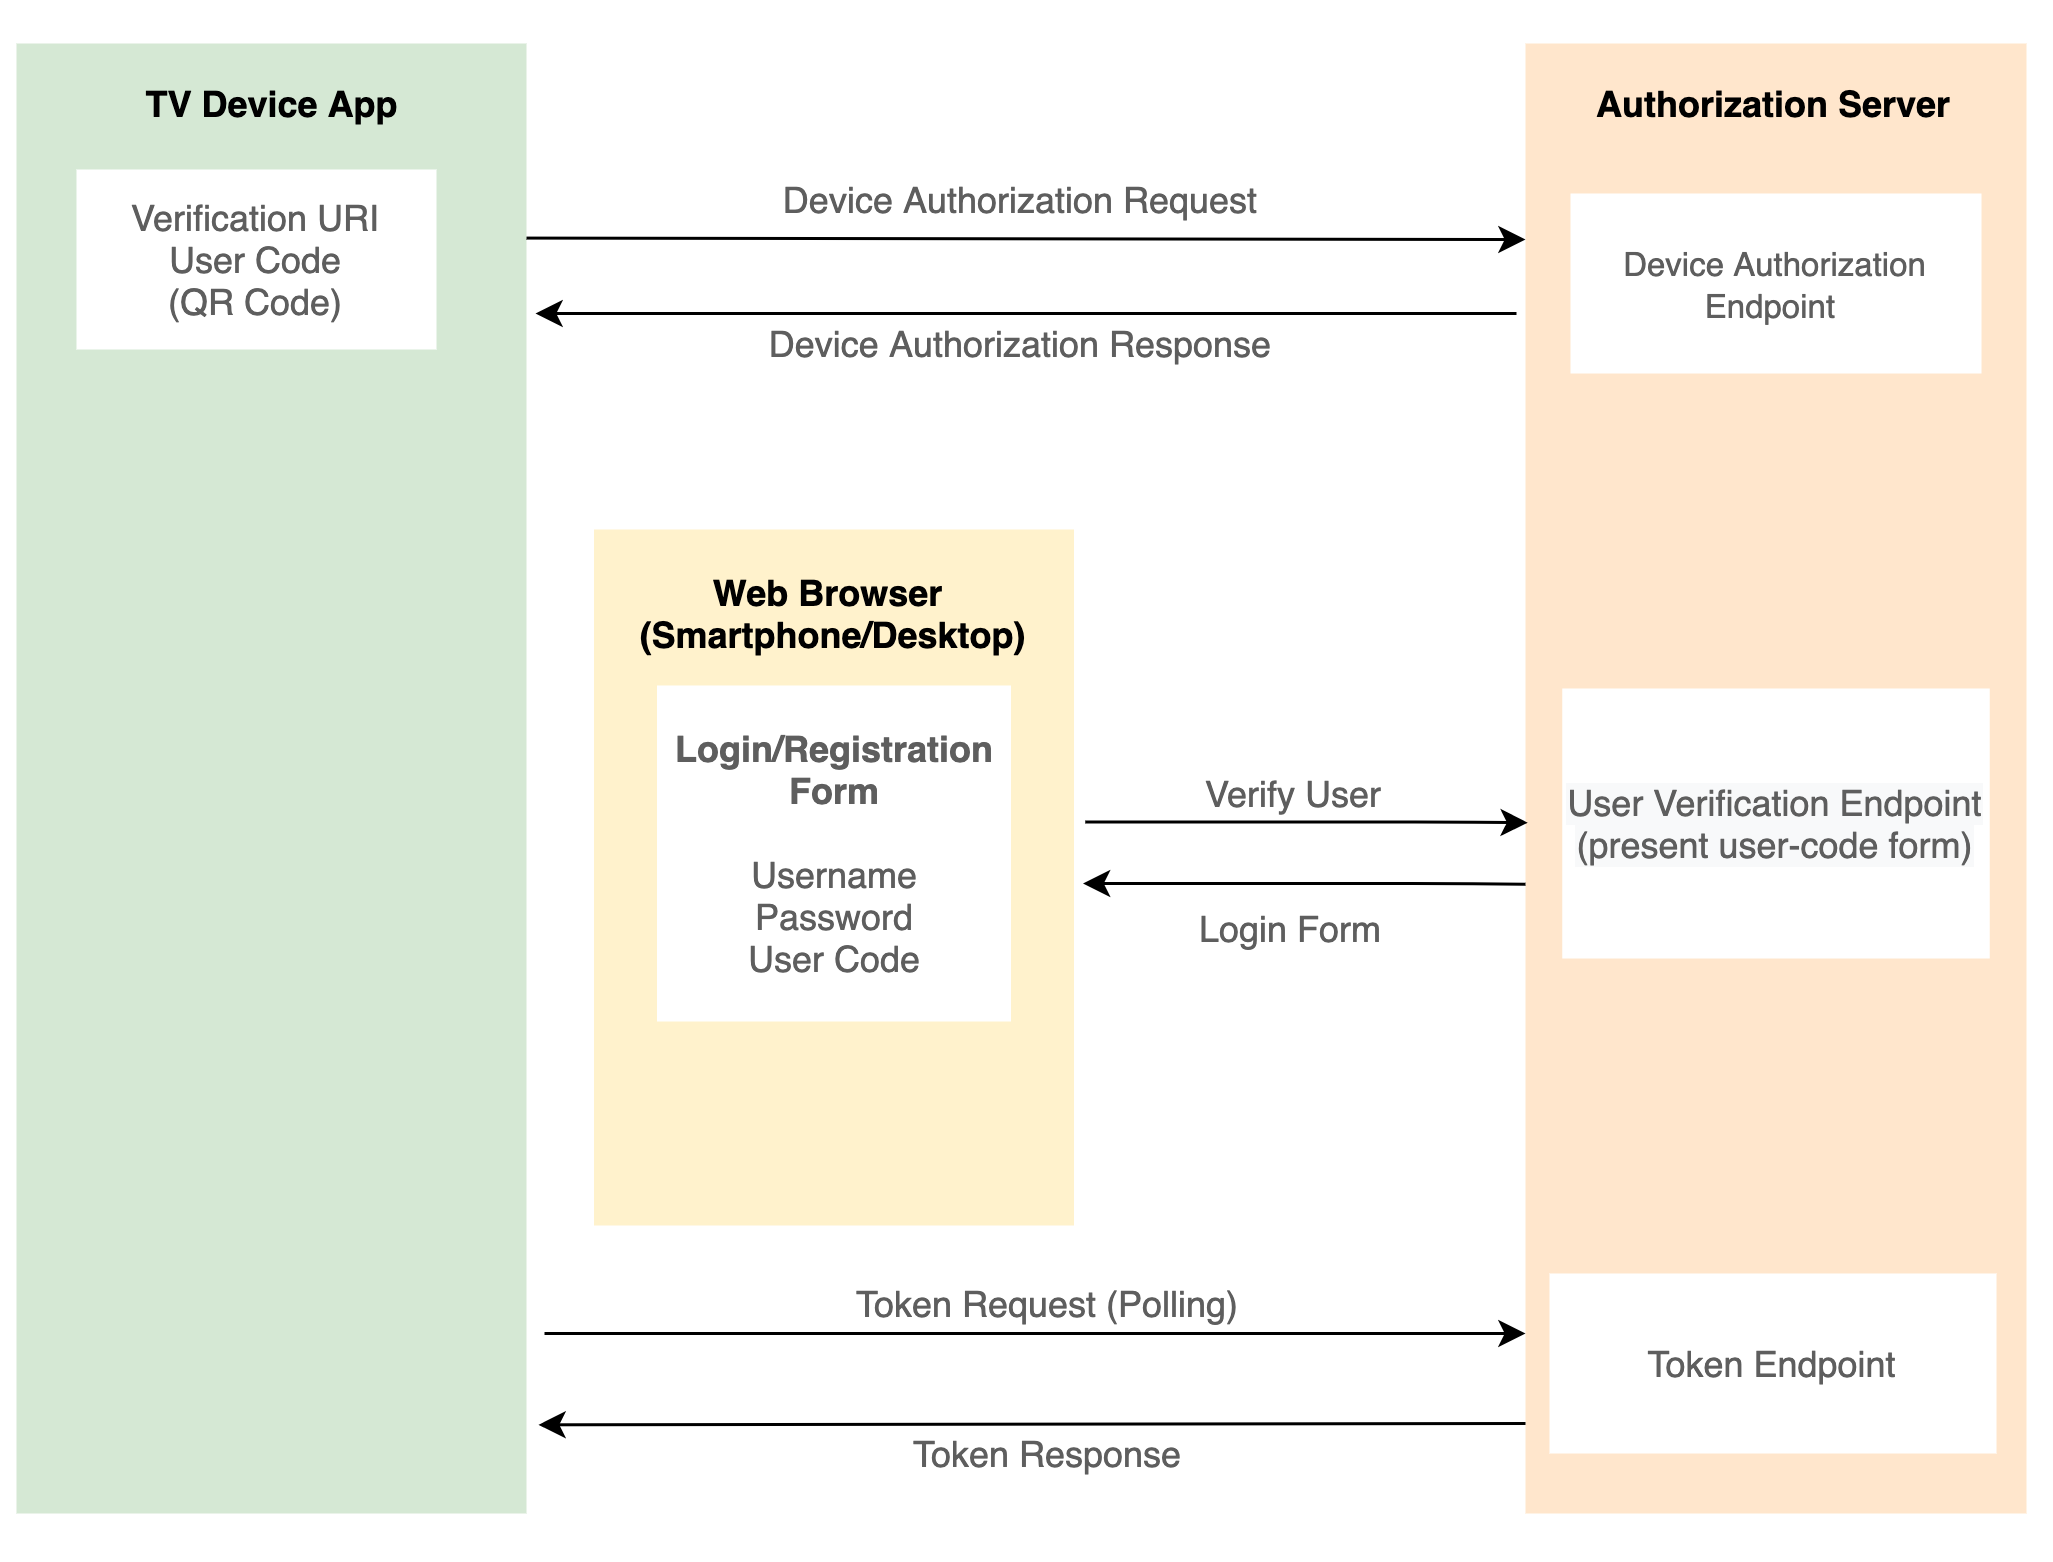
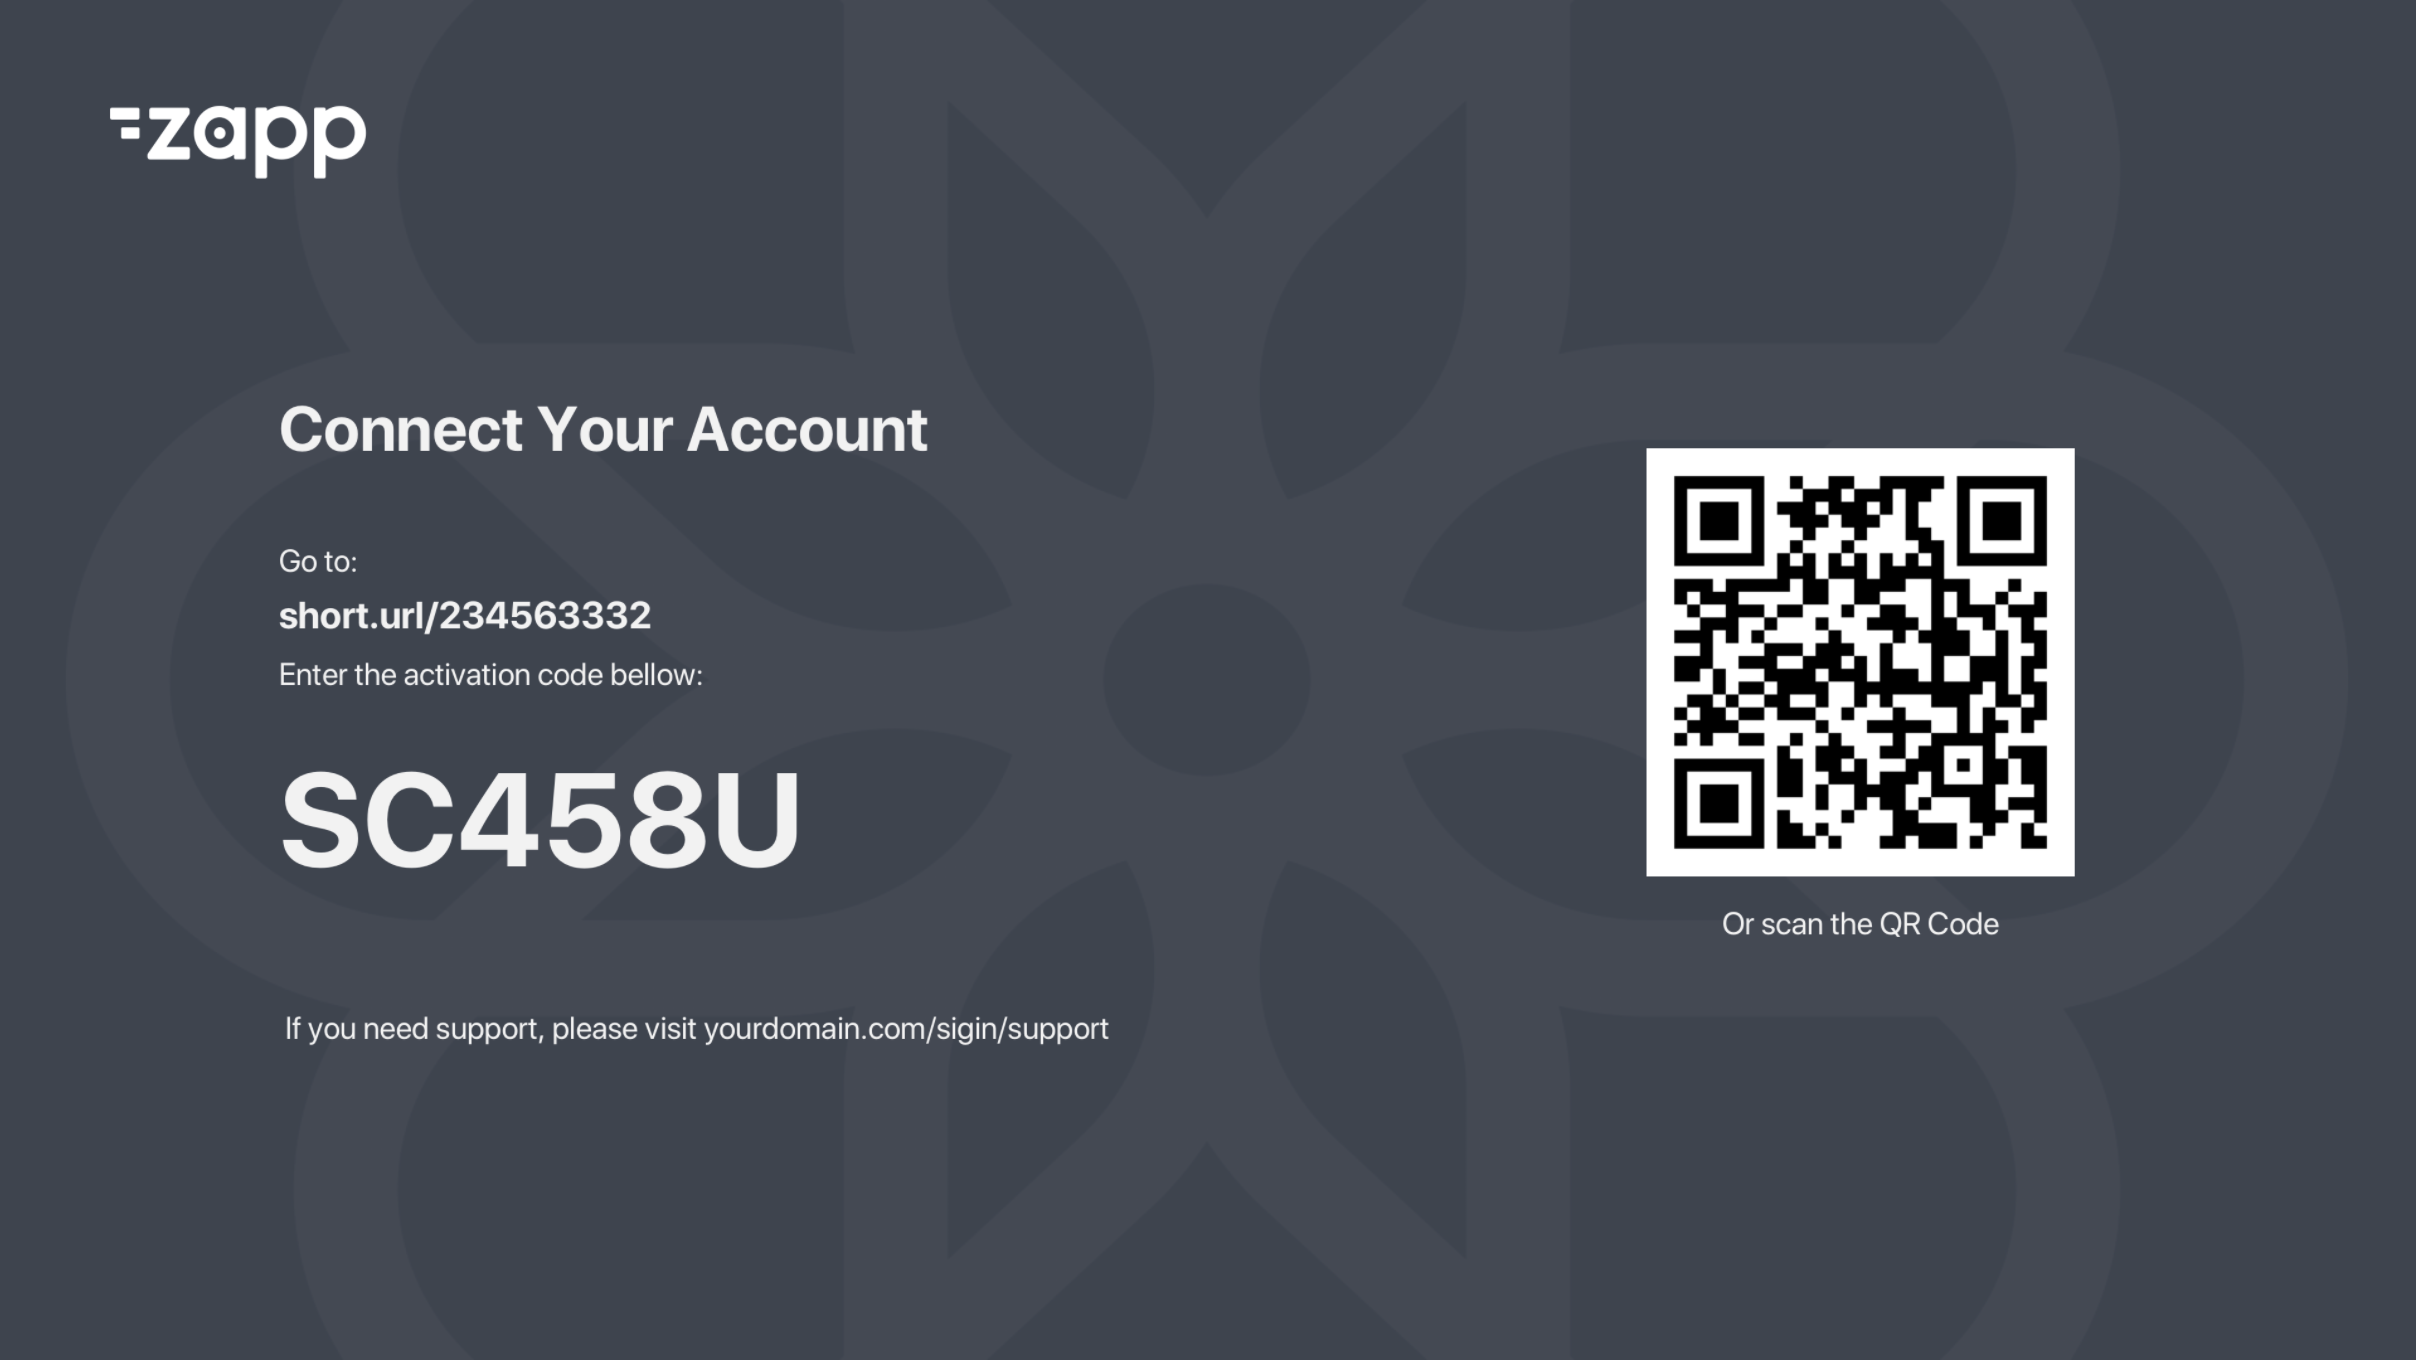
- User navigates to the sign-in page in the app.
- App presents a QR code/ URL to the login form.
- User opens to the browser using the URL, fills the form and submits.
- App polls the authorization server token endpoint to get user's status.
- Once the user is authenticated via the the web browser form, the authorization server returns the token to the app.
- Token is stored on the TV device and can be used as a
context keywhen accessing content.
TV OAuth2 plugin
TV OAuth2 Login plugin is Applicaster's implementation of a OAuth 2.0 Device Authorization Grant.
Notes before you start
- Applicaster offers out of the box integration with
inPlayer & Cleeng. - Applicaster also supports any OAuth2 implementation that supports OAuth2 Device Authorization Grant flow.
If you use a provider that supports
OAuth2 Device Authorization Grant flowMake sure to get the following:- App client id
- Device endpoint
- Token endpoint
- Refresh endpoint
You can read more about Device flow here - https://developer.okta.com/blog/2019/02/19/add-oauth-device-flow-to-any-server
- In the case your Authorization provider is not supporting Device flow, Please contact your customer success representative to find out how to integrate your custom login implementation.
Setup endpoints
Go to Zapp endpoints section and add the following
Create a new endpoint called oAuth2 API
- Set its URL to to the login URL your Authorization provider gave you.
If you are using Cleeng or InPlayer set it to
https://login-flow.applicaster.com/api/app - Set its HTTP Method to
POST - Set its mime type to
application/x-www-form-urlencoded
Create another endpoint called oAuth Refresh
- Set its URL to the refresh URL your Authorization provider gave you.
If you are using Cleeng or InPlayer set it to
https://<YOUR_PROVISION_URL>/<YOUR_PROVIDER>/refresh. Please consult your your customer success representative to get the exact URL.
- Set its HTTP Method to
POST - Set its mime type to
application/x-www-form-urlencoded
Setup feeds
Create a feed called TV Device Auth
- Set its URL to the device URL your Authorization provider gave you.
If you are using Cleeng or InPlayer set it to
https://login-flow.applicaster.com/api/app/device
For more info see Device Authorization Response
Create a feed called TV Device Token
- Set its URL to the token URL your Authorization provider gave you.
If you are using Cleeng or InPlayer set it to
https://login-flow.applicaster.com/api/app/token
For more info see Device Access Token Response
Create a feed called Refresh Token
- Set its URL to the refresh URL your Authorization provider gave you.
If you are using Cleeng or InPlayer set it to
https://<YOUR_PROVISION_URL>/<YOUR_PROVIDER>/refresh
Features
- Supported on Apple TV, Android TV, Amazon Fire TV, Samsung TV, LG TV and Roku.
- Can connect to any Authorization Server that follows the OAuth 2.0 Authorization Grant flow specifications.
- Supports refresh token.
- A Screen Plugin with UI configuration in Zapp Studio.
- Can be used as a standalone Login/Sign Up screen which could be accessed by the user from settings or any navigation action, or as a gatekeeper to restrict specific content in the app.
- Localized texts.
App Set up
Plugin
Add the plugin TV OAuth 2.0 Login to the app version via the plugin configuration. Make sure you add the plugin to all relevant versions and platforms. Once added, you will need to rebuild the app to be able to use this functionality.

Screen
Add the OAuth 2.0 Login screen in Zapp Studio.
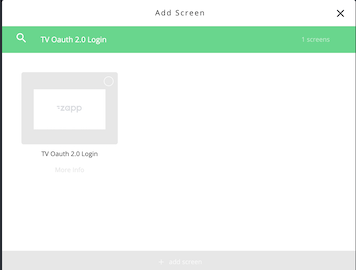
The screen is the entry point to initiate the login flow. The screen can be used as a standalone screen, or be configured as a screen hook to act as the gatekeeper for locked content.
- Client ID (Mandatory): as provided by the provider.
For Cleeng use
cleengand for inPlayer useinPlayer
-
Device Endpoint: set to the
TV Device Authfeed you created before. -
Token Endpoint: set to the
TV Device Tokenfeed you created before. -
Logout Endpoint: Leave empty - unless your authorization provider instructed you differently.
-
Scopes - Leave empty - unless your authorization provider instructed you differently.
The section below should be filled if you are using Cleeng or inPlayer It allows you to customize the web login screens to your provider and brand.
API URLs
Only set API URL if you use Cleeng or inPlayer
Login URL: https://<YOUR_PROVISION_URL>/<YOUR_PROVIDER>/login
Register URL: https://<YOUR_PROVISION_URL>/<YOUR_PROVIDER>/register
Reset Password API URL: https://<YOUR_PROVISION_URL>/<YOUR_PROVIDER>/reset
Refresh URL: https://<YOUR_PROVISION_URL>/<YOUR_PROVIDER>/refresh
Login Links
- Add web URL to a web page that contains extra information on the registration and login process (links appear on the intro screen)
- Add web URL to a web page that contains terms and conditions information (link appears on the registration form)
Optional registration fields
- You can enable/disable what field you would like to present on the registration form.
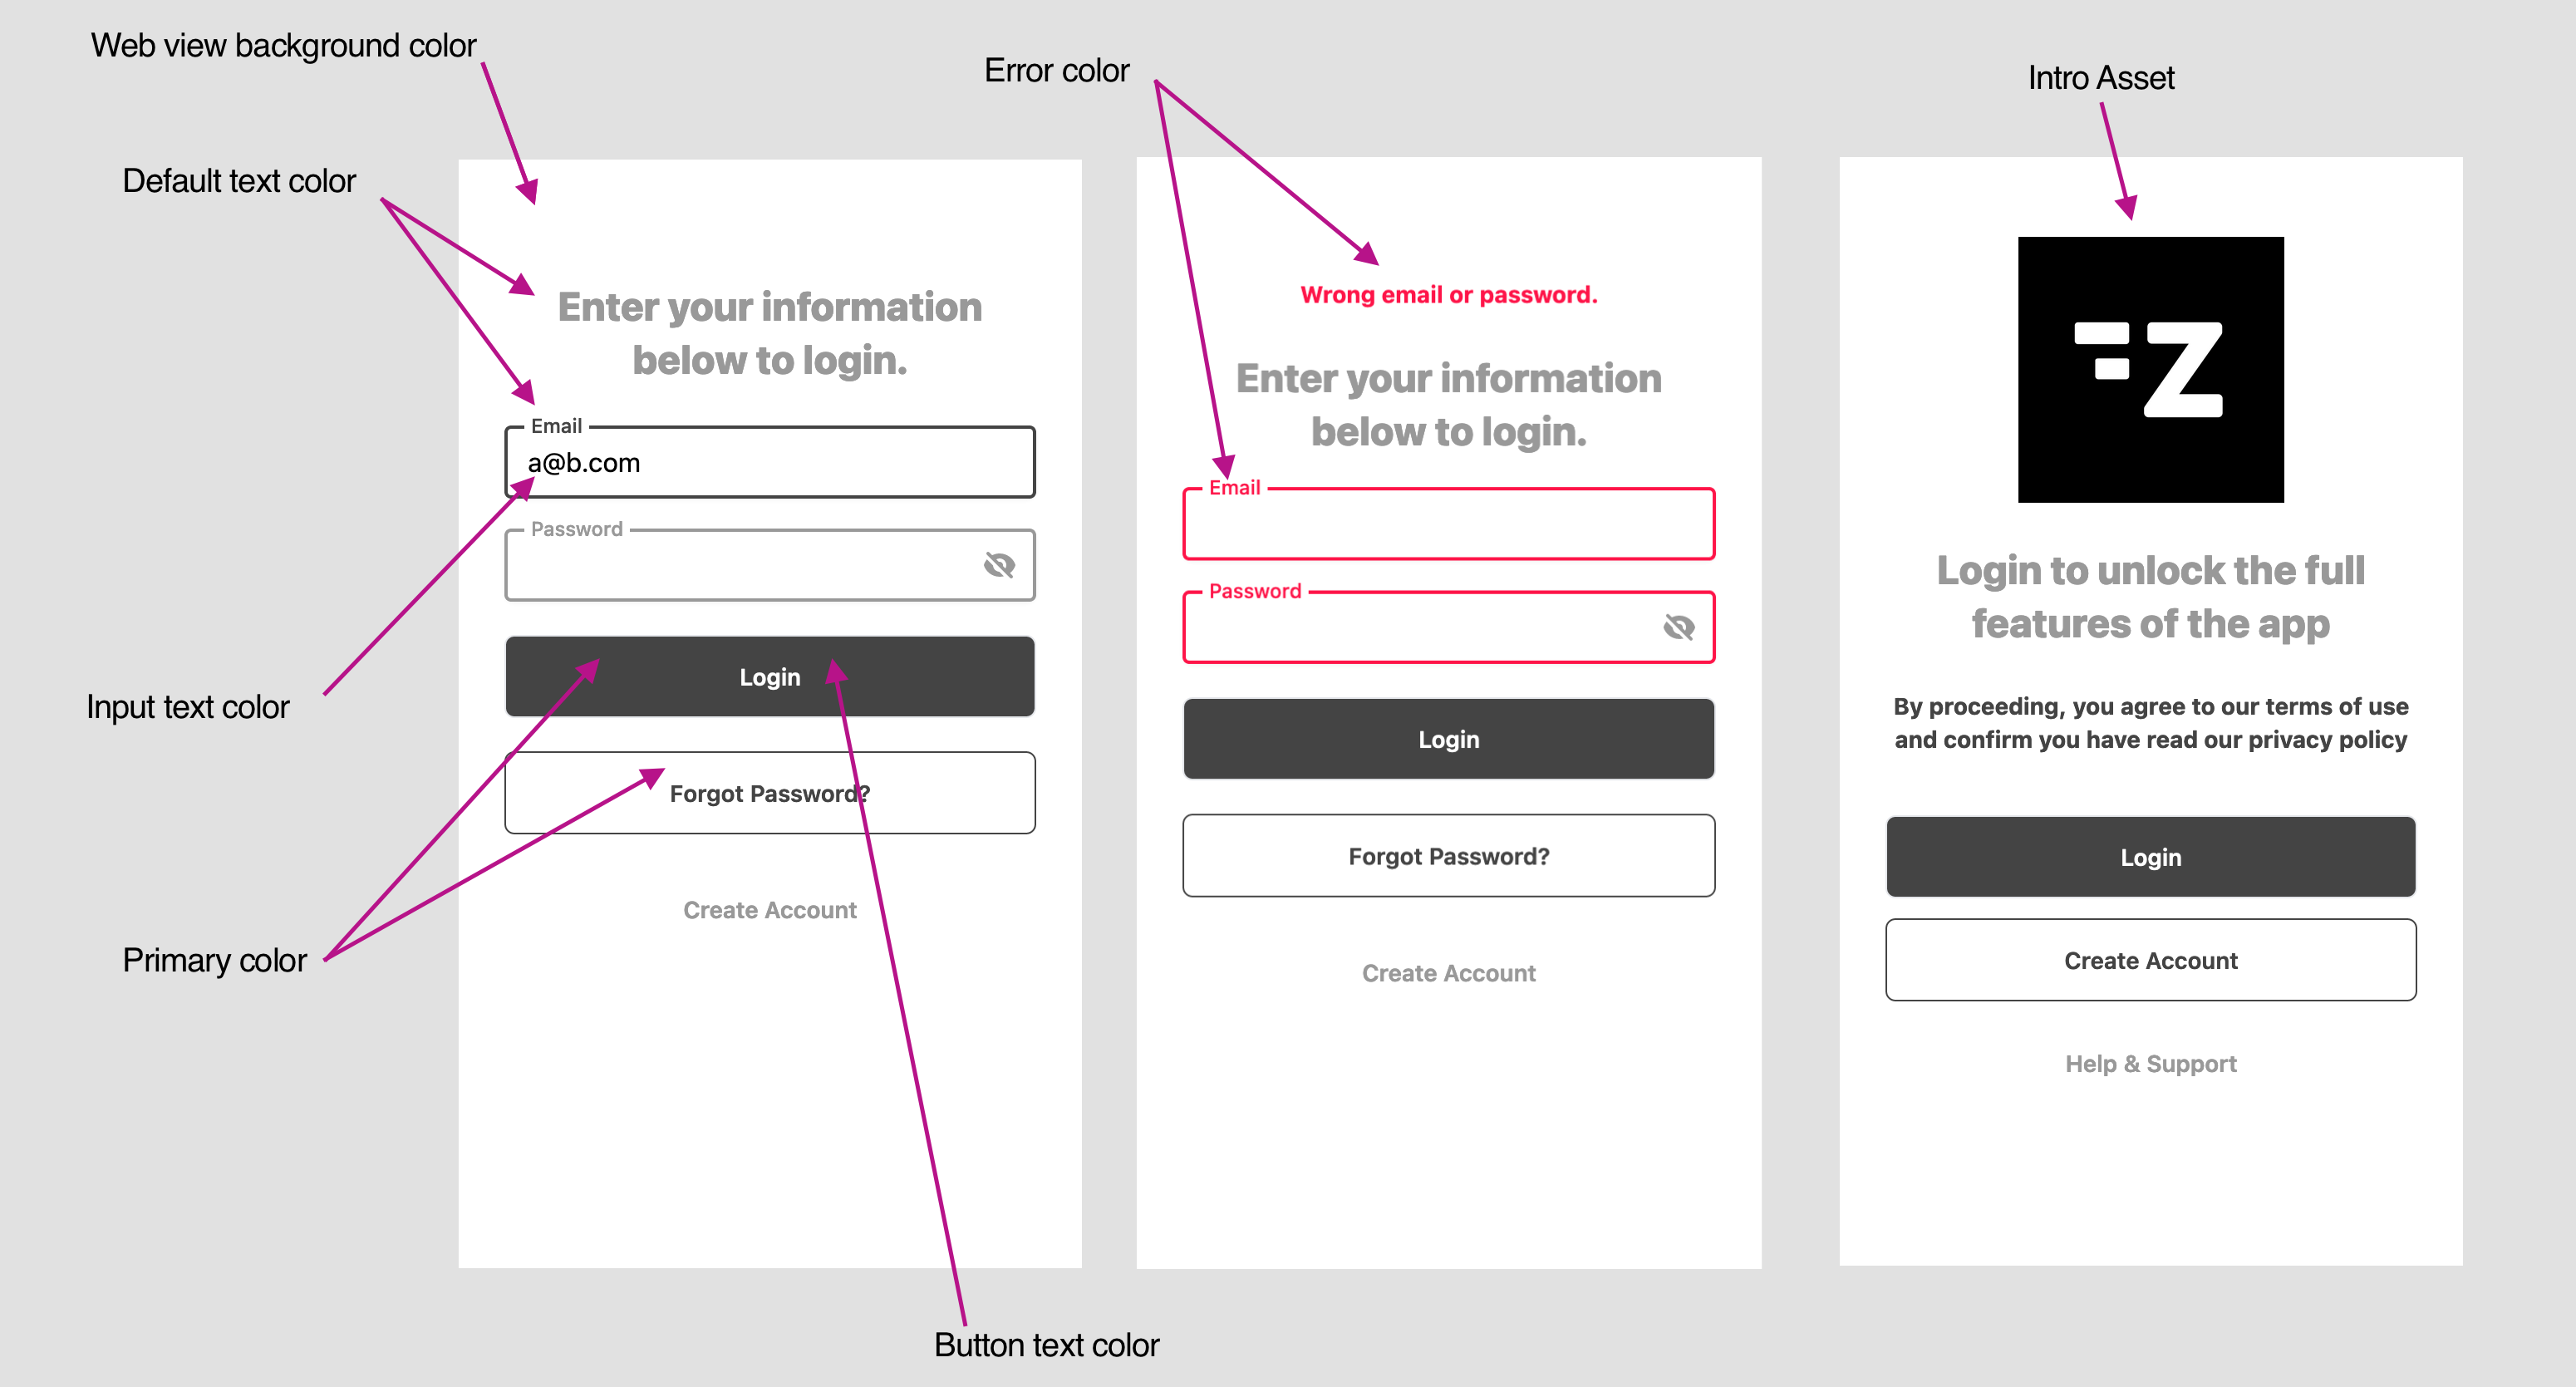
Styles
Configure the mobile web forms styles
Adding the login screen as a hook for video content
One of the use cases you might want to handle is to prompt the login and authentication flow before playing a video. This experience is recommended, as it allows user to browse the app and it also enables some content to be free, and some behind a login.
You can achieve it by using our screen hooks mechanism:
- In Zapp studio, make sure you add
Quick Brick Player Pluginscreen. - Once added, select the player screen and scroll down the configuration panel to the SCREEN STORYBOARD section. Select the
Loginscreen from the plugins dropdown. - Click on the
+button and save the layout.

Configure the screen styling
The screen allows Zapp Studio users to configure styles and assets which will be remotely loaded. Please use the styles and localization section to setup the screen as you desire.